Folding Card Organizer, Mark II


Folding Card Organizer, Mark II
Published 2019-02-05T17:17:56+00:00
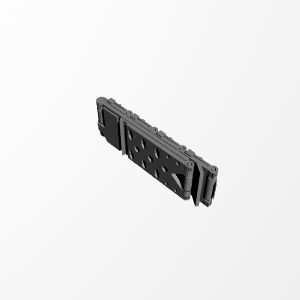
This is the second version of the folding card stand. Now it folds down smaller, has better hinges, and a fourth card tray.
Foldable, storable, collapsable card holder for boardgames and card games. There are other card display things out there but none that can fold down and store away easily. This should have the same volume as a small hardback book when it's collapsed so it should fit in game boxes between plays. It can hold both euro and american style cards. If you notice anything you'd like me to upgrade, let me know!


Printer Brand:
CEL
Printer:
CEL Robox
Rafts:
No
Supports:
Yes
Resolution:
Any
Infill:
15% +
Notes:
Print it on its side, flat side down. The hinges need to be printed vertically. Set your support overhang to 60-70%. This is important so you do not get support material inside the hinges which gums them up. One again, make sure your printer is calibrated and your circles are all circles across the whole build plane. It will take a while to print so watch for upward curling that can collide with the head de-position the head or knock over the piece.
Post Printing
Post printing you'll need to clean a few things up.
First you'll need to gently cut the manual raft between the top card beam and rafter. This is in place to keep that part from detaching and running away during printing.
Second you'll need to cut any of the bed-attached sides that melted together during printing. This is desirable because it gives all the assembly's rigidity during printing and helps the whole piece adhere to the print bed, but sometimes they need a little exacto work afterwards.
Now check the axle inside each hinge to make sure that it is not fused to the barrel. Especially on the bed-side of the piece one or two of the hinges might have a 45-60 degree arc of the axle attached with some seepage from the first print layers. A few seconds with an exacto knife on any that are attached will do the trick.
Next slowly open the main hinges giving any stray support material time to break away. They should open fairly readily.
Now exercise the top beam so that it can swing freely around the top hinge.
Lastly for each of the card tiers push them open from behind by applying equal force to both of the protruding card catches. Trying to open them from one side will frequently snap the tray.
Everything is maximally compacted for printing so you should end up with less than a few grams of stray support material when you're done.
| Date published | 05/02/2019 |