Layer Height Reference Display


2,524
visitas
128
descargas
4
colecciones
0 comentarios

Cargando comentarios... 
Layer Height Reference Display
Published 2019-06-09T10:20:20+00:00
17
0
Add to Collection
Descripción
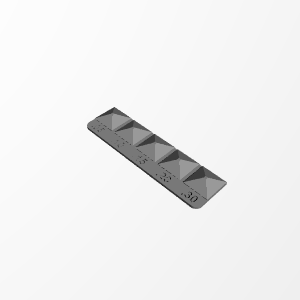
A display reference for layer heights.
Detailed printing instructions are in the "Printing Details" section. It is a bit involved.
Licencia


Detalles de impresión
Simplify3D Printing Setup
- Import model
- On the top menu go to "Mesh > Separate Connected Surfaces" to separate out the sample swatches from the base
- Add a new process for each swatch
- Add new process
- Click "Select Models" and select only the current swatch
- In "Layer" set the appropriate layer height
- Repeat for each swatch setting the infill pattern different for each. An easy way to do this is to just copy the first one you made and just update the infill and select the corresponding new swatch
PrusaSlicer Printing Setup
- Import model
- Set the slicer to expert mode
- From the top bar select "Split to Parts" (it is important to split to parts and not split to objects because the latter will have the slicer force the objects to the bed and I could not figure out how to get it to let me move them off the bed. If you know how let me know in a comment)
- Adjust the layer height settings for each swatch
- Right click the gear next to the swatch in the right hand object list
- Select "Layer and parimaters" to add those modifiers
- Remove alll but "Layer height" so that you can make sure you do not have anything overriding you do not mean to
- Set "Layer height" to the appropriate layer height for the swatch's position (0.05/0.10/0.15/0.20/0.30)
Color Print Info
If you want to do the color changes like I you add a color change at 1mm for the bottom of the text and one at 2mm for the start of the swatches.
Información técnica
| Date published | 09/06/2019 |
| ¿Cuándo tiempo lleva? | 100 - 110 minutos |
| Cantidad de filamento | 93 |
| Dimensiones | 110mm x 30mm x 7mm |
| Sin apoyo | YES |
Más información
Archivos