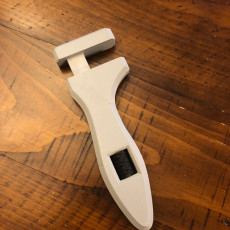
Oldie Wrench


Oldie Wrench
Published 2018-08-20T17:54:06+00:00
Summary
Everyones favorite Canadian AvE posted a video about a wrench made by Hand Tool Rescue. I really liked the design and thought it would work great as a 3d printed design for a kind of wrench clamp combo. My design definitely isn't as Skookum as the metal one made by Hand Tool Rescue but I have to say its far stronger than you would expect, especially since I didn't go too gun hoe on the print settings.
This model was made entirely in Fusion 360. I used a screencap of the AvE video to get the general outline so it fits nicely in the hand, but everything else is my own. The main difference is that mine doesn't have the same pretty slide mechanism where you can see the shaft of the Head go all the way in. This just gives up too much strength and adds complexity to the print so I just enclosed it.
Some Assembly Required
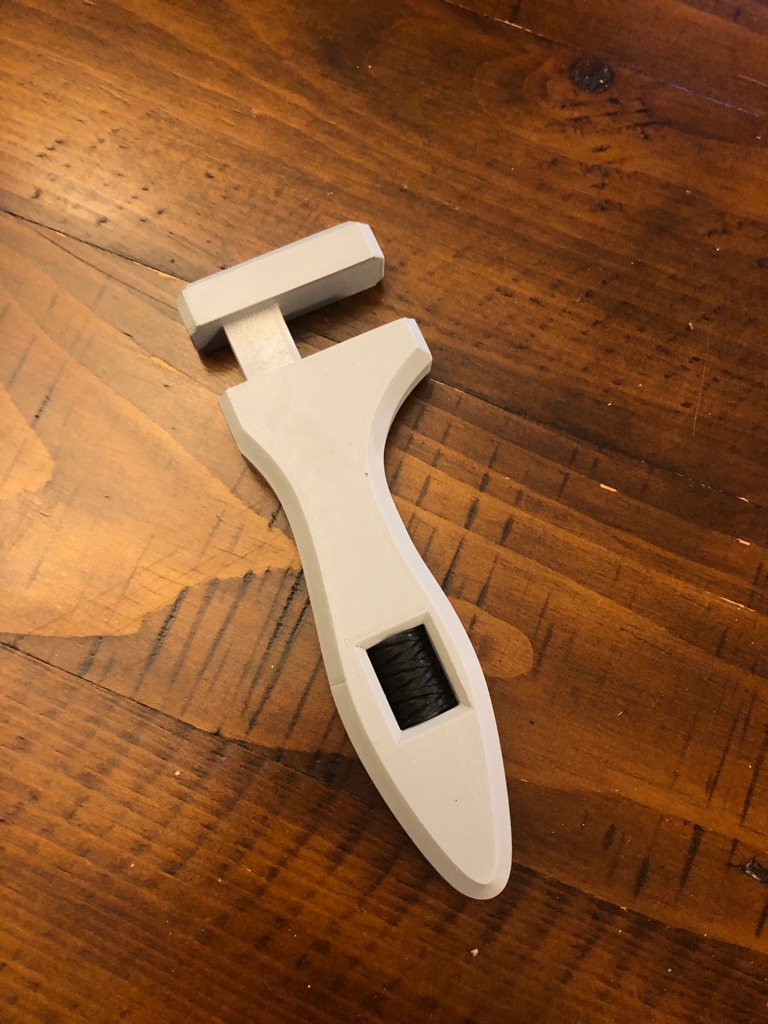
This model comes in 4 different .stl files. The hardest part about this print is that the thread.stl and nut.stl need a smaller layer height (I would keep these layer heights the same to ensure the threads mesh correctly) and I would recommend a high infill density. The other two files print pretty easily and should be fine with about a 30% infill but mileage varies with filaments and how heavy you plan to use this tool.
Assembly of the parts is easy but does require some super glue or a similar libation. The thread.stl has a hex on one end that should fit nice and snug into a hex on the head.stl. An important step that I would recommend is before gluing I put the thread into the end of my drill and held the nut with a pair of pliers and just slowly worked the thread through. You might have to go back and forth a few times if you have any especially rough parts but this makes it work much better once it has been assembled.
Should you run into issues with your supports, it may also be smart to do some sanding on the head before putting it into the handle. It should slide right in without any resistance. If its hard to push in its going to be much harder to pull out!
Print Settings
Printer Brand: Creality
Printer: Ender 3
Filament: ZIRO 3D Printer Filament PLA 1.75mm Marble Color
Handle
Build time: 1 hour 31 minutes
Filament length: 7571.7 mm
Plastic weight: 22.76 g (0.05 lb)
Supports: No, if your really worried you could put some on the inside, but its a small bridge and the supports would be a pain to remove so I wouldn't bother.
Layer Height: .2mm
External Fill Pattern: I liked the look of concentric but it shouldn't matter.
Head
Build time: 0 hours 33 minutes
Filament length: 3811.6 mm
Plastic weight: 11.46 g (0.03 lb)
Supports: I printed it on its side so the entire shaft that goes into the handle needs supports under it.
Layer Height: .2
Thread
Build time: 1 hour 18 minutes
Filament length: 538.1 mm
Plastic weight: 1.62 g (0.00 lb)
Supports: No
Layer Height: .1
External Fill Pattern: Concentric
Make sure to print this with the hex side down on the print bed, this ensure that you get some really nice threads.
Nut
Build time: 0 hours 49 minutes
Filament length: 729.4 mm
Plastic weight: 2.19 g (0.00 lb)
Supports: No
Layer Height: .1
External Fill Pattern: Concentric
Make sure to print this with the flat side down on the print bed, this ensure that you get some really nice threads.
Download
Check out this Project on my GitLab
Check out this Project on my Blog


| Date published | 20/08/2018 |
| Tecnologia | FDM |
| Complessità | Easy |
Nice model! Had do some sanding on the shaft to get it to fit, but it looks and moves great now!